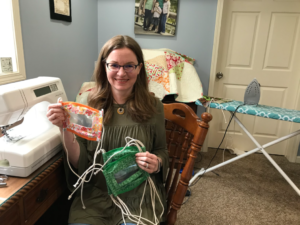
The “Clear Covid Mask” is a DIY COVID-19 mask that lets others see the wearer’s mouth. This helps everyone communicate better, especially those who are Deaf or Hard of Hearing.
David saw a TV news clip about Michigan nurse Sarah Bloomfield and her doubly heroic front-line design thinking. Designing a mask that helped a Deaf colleague work better with Sarah was clearly another case of how when we design for the extremes, everyone benefits. Our team decided we want to help make it easier for everyone to be able to make their own. So we worked with Sarah to create improved, accessible DIY instructions, prototypes, and plans. And indeed, field testing has demonstrated that, while people who are Deaf and hard of hearing benefit especially from others wearing such masks, everyone communicates better when they can see each other’s mouths.
Here’s the recipe that resulted…
What you will need
- 100% tight-woven cotton fabric, 24″ x 8″ (0.6m x 0.2m) (cotton t-shirts, tea towels, or sheets can be used in place of new fabric)
- Thin gauge clear vinyl or a heavy-weight clear shower curtain liner, 5″ x 3″/12.7cm x 7.62cm
- Thread (polyester recommended)
- ⅛” (3mm) thick cotton cording, 53″ (1.33m) long (cotton clothesline)
- Extra-wide double-fold bias tape, ½” (12mm) wide
Pre-Assembly directions
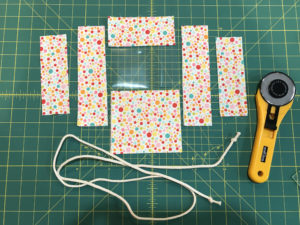
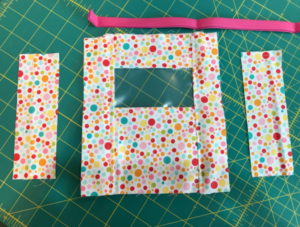
Cut the materials to yield these pieces:
- Clear Vinyl Mouthpiece: 1 piece 5″ x 3″ (12.7cm x 7.6cm). Note: finished window is 4″ x 2″ (10.2cm x 5.0cm)
- Top Piece: 2 pieces 5″ x 2¼” (12.7cm x 5.7cm)
- Bottom Piece: 2 pieces 5″ x 4½” (12.7cm x 11.4cm)
- Side Pieces: 4 pieces 2″ x 7½” (5.0cm x 19.0cm)
- Side Casings: 2 pieces 2″x 6″ (5.0cm x 15.2cm)
- Cording: 53 inches (1.3m)
- Bias Tape: 2 pieces 7″ (18cm) each
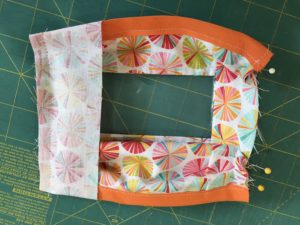
Note: All the components (with the exception of the side casings) will be made up of 2 plies of fabric, with good sides facing out. Here’s a photo that shows an example of one of each piece:
Assembly Directions
- Seam Allowances:
- All seams that are sewn through the vinyl are ½” (12.7mm).
Note: You want to limit the number of times that the vinyl is punctured so that it doesn’t tear in the wash. Do not backstitch through the vinyl. Use knot mode or tie off seams starting and ending in the vinyl.
- Seams that are sewn through fabric on fabric are ⅜” (9.5mm).
- All seams that are sewn through the vinyl are ½” (12.7mm).
- Stitch Length:
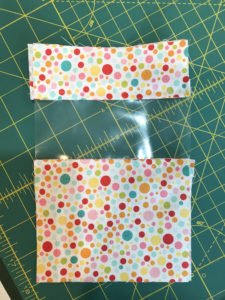
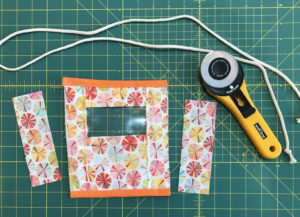
Set the stitch length to 3.0 through vinyl. Set it to 2.6 through fabric. - Take the top pieces and place the good sides together (facing each other) then insert the clear vinyl piece between them, lining up the long edges of the fabric with the long edges of the vinyl. Stitch the long edge. Finger press open, then top stitch ⅛” (3.175mm) from the edge of the vinyl. Note: You might be tempted to grab your iron and press this open. Don’t! You don’t want to nick or melt the vinyl with your iron!
- Repeat with the bottom pieces, then the side pieces.
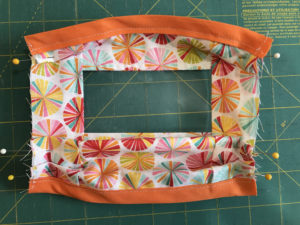
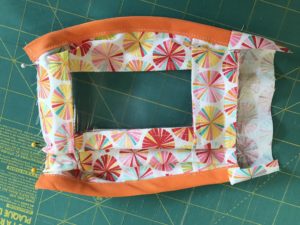
- Sew the double-fold bias tape to the top and bottom edges of the mask. Stitch ⅛” (3.175mm) on the other two raw sides as a stay stitch. Note: You can do all of this without taking it out of the machine by attaching the top piece of bias tape, turning and stitching down the side, attaching the bottom piece of bias tape, turning, and then stitching back up the other side. Make 3 pleats on the front of the mask as shown in the picture (the finished length of the sides must be 5″ (1.27cm) after you make your pleats), and pin in place. Depending on your comfort level with sewing, you can then baste this … or just keep it pinned for the next step.
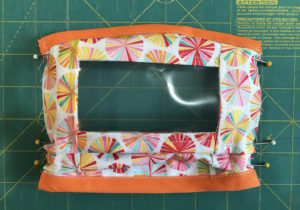
- Attach side casing pieces by placing the mask front side down (the side with pins in it, that you hopefully pinned, poking out on the sides so that you can still see them), and put the side casing piece good side down. It should extend ½” (12.7mm) above and below the edges of your side. Fold these edges under and sew, making sure to backstitch.
- Tie a knot in both ends of the cording piece.
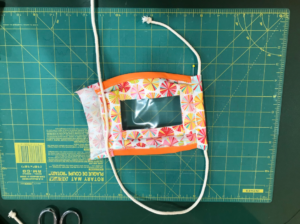
- After both side casings are attached, flip the good side up and pull casings out to the sides. Fold the raw edge under about ¼” (6.35mm), fold over the cording, and pin in place. Note: the knotted end of the cording needs to extend above the top of the mask. The loop should be at the bottom of the mask. This is very important as it determines where the window is when it’s put on. Stitch casing in place, close to the folded edge, making sure not to stitch the cording. The cording needs to be free to slide up and down for fit.
- Done. Thank you!